Windows Autopilot is a collection of technologies used to set up and pre-configure new devices, getting them ready for productive use.
You can also use Windows Autopilot to reset, repurpose, and recover devices.
Autopilot Process for brand new devices:
This is ideal for devices that have just been taken fresh out of the box.
We need to set this device up to be provisioned by Autopilot.
When you first switch on a device, it will ask you to setup languages, keyboard layout and if you would like to setup for Personal Use or Organisation use.
We need to grab the full baseboard ID of the device. We can do that by running the Get-WindowsAutoPilotInfo script. You can find this here:
https://www.powershellgallery.com/packages/Get-WindowsAutoPilotInfo/1.6
See guide for a tutorial on how to setup the script: Windows Autopilot / Get-WindowsAutoPilotInfo Script | D:\domain\daffyduck.tech
If you select SHIFT + F10, this will open a CMD Command Prompt:
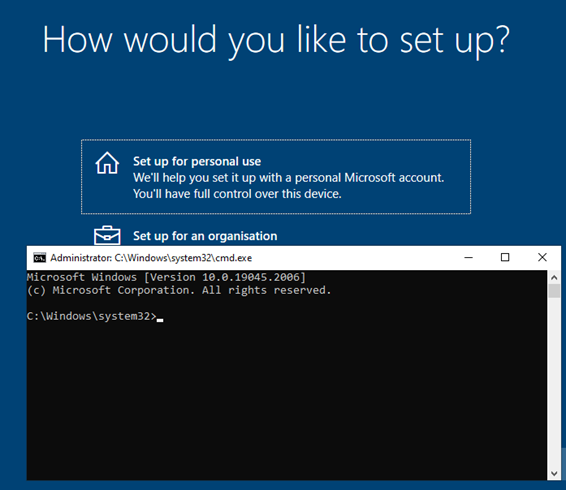
Please Note: On some devices, you may need to select FN+SHIFT+F10.
Once you have the Command Prompt open, Type and enter ‘explorer.exe’
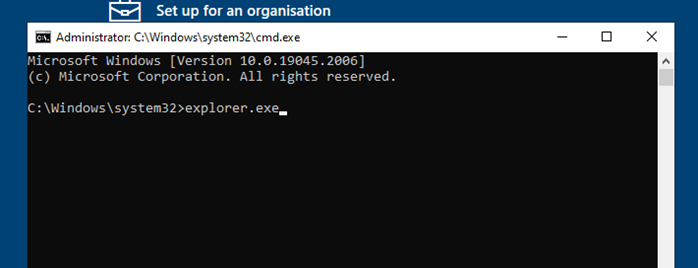
This will open Windows Explorer.
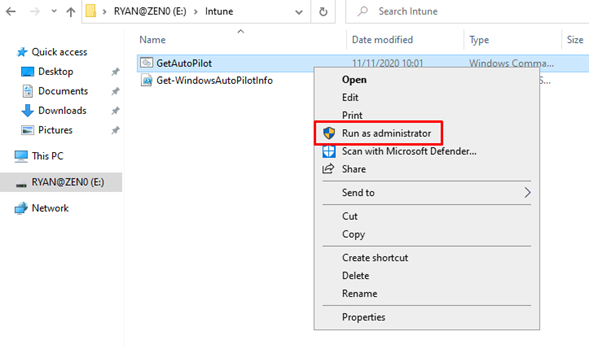
Make sure that you have a USB Flash Drive (Memory Stick) plugged into the device with the Autopilot Service Tag Script. Browse your USB and run ‘GetAutoPilot’ as administrator.
Please Note. If there is an Excel CSV file in this folder prior, then be sure to delete it before you run ‘GetAutoPilot’ as administrator.
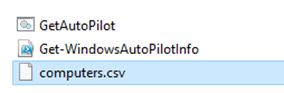
After you run ‘GetAutoPilot’ as administrator. It will generate an Excel CSV file with the complete Service Tag of the device.
We now need to import these CSV file into Intune in the Endpoint Manager Admin Center.
You can access Endpoint through this link: https://endpoint.microsoft.com/?ref=AdminCenter#home
On your own work device, sign in using your organisation’s Office 365 Credentials. You will see this in front of you
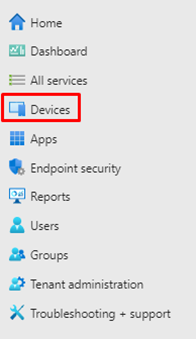
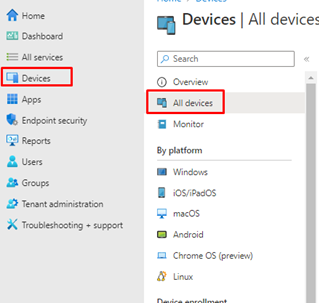
On the left-hand side, select ‘Devices’
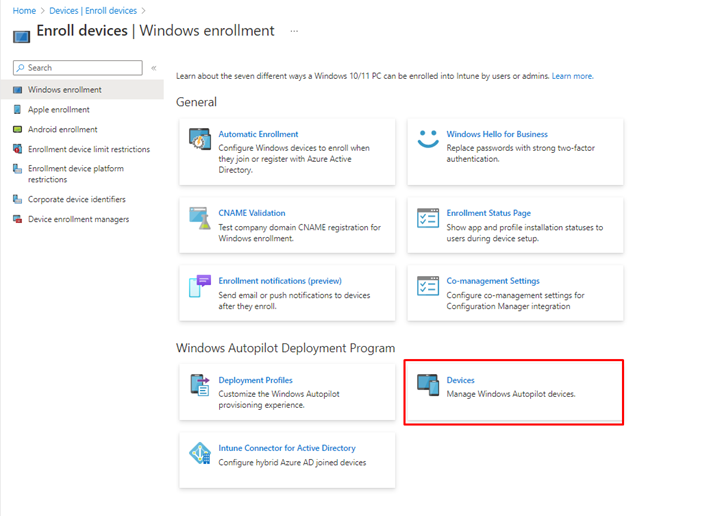
Then select ‘Enroll Devices’

Then select ‘Devices’ underneath ‘Windows Autopilot Deployment Program:
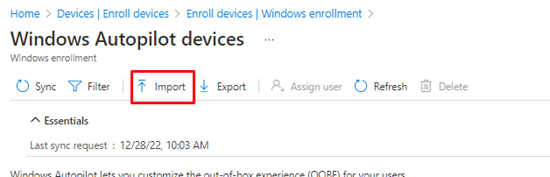
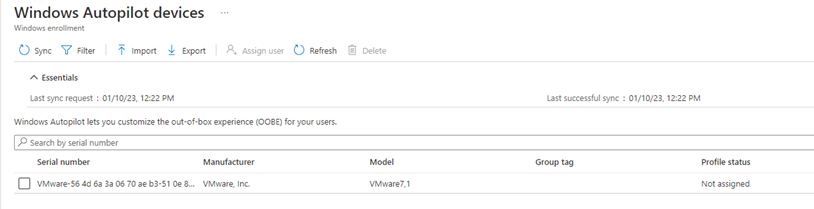
You will then see this in front of you:
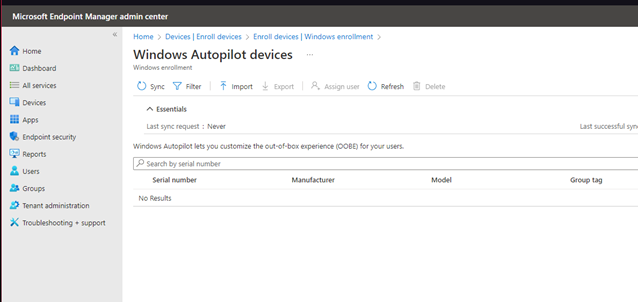
This is a list of all Windows Autopilot devices within the organisation.
We need to import the CSV file that was generated through the ‘GetAutoPilot’ script into Intune.
Select ‘Import’
After you select ‘Import’, a window will appear on the right:
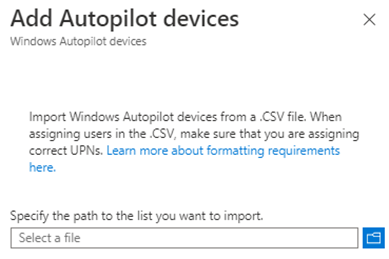
Select the ‘Blue File Box’. This will open File explorer.
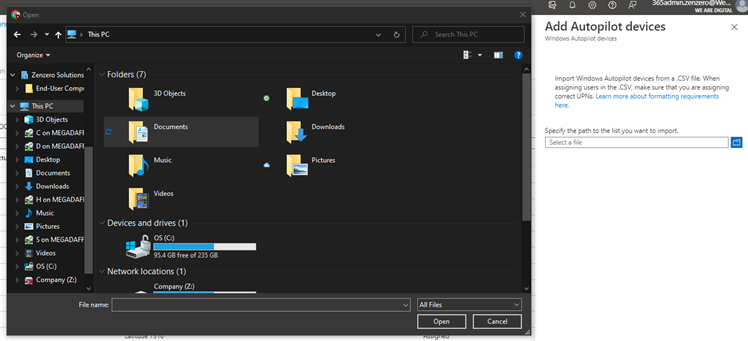
Unplug the USB Flash Drive from the new device and plug it back into the device with Endpoint open. Find the CSV file and then select ‘Open’
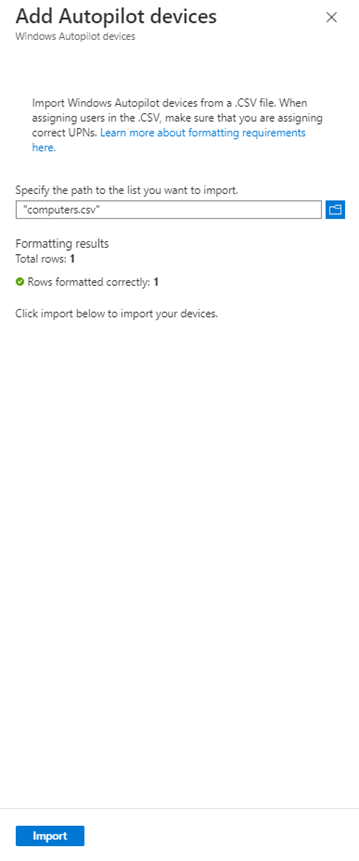
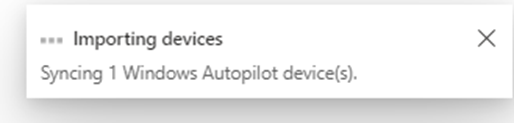
This will display that the CSV file has been imported successfully.
Select ‘Import’
Endpoint will tell you that it is syncing the device into Intune. This can take up to 15 minutes. It can take longer.

You have successfully imported a device into Intune as a Windows Autopilot Device.
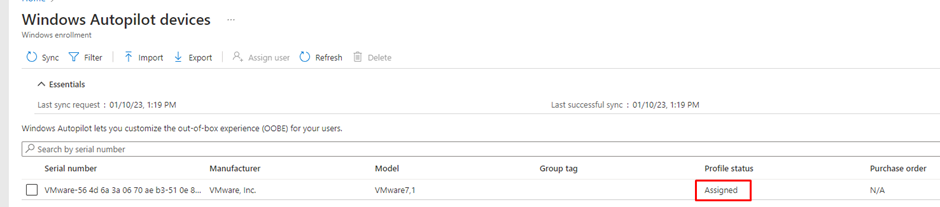
After a while, go back to Endpoint and search for the device under Windows Autopilot Device.
We need to wait for the Profile Status to say ‘Assigned’.
If it is not assigned, then the device will not be able to find itself through Autopilot.
If your tenant uses dynamic groups, then it will take some time for the device to be added to the Autopilot devices group. Once added, it will have a profile assigned:
Restart the new device and make sure that the new device is connected to the internet via an ethernet cable.
The Autopilot process relies on a strong fast internet connection otherwise it will fail. A Wired connection is fastest and a more reliable method.
Make sure that the device is plugged in if it has a charger.
Once the profile has been assigned the device, switch the device on. It should grab the profile and ask you to sign in:
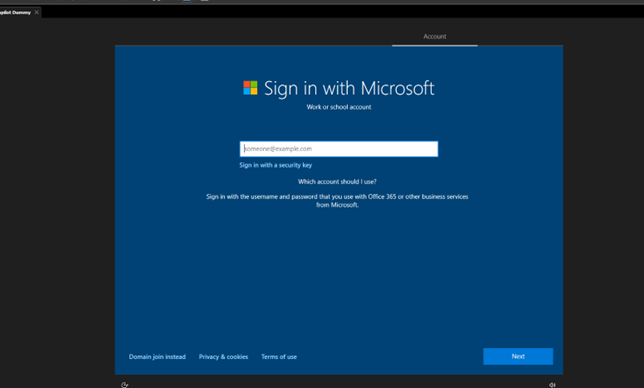
Sign into Microsoft with the email address that is going to use this computer.
If the account has not been created yet, then sign in using the Office 365 admin account.
Both accounts need to have a Microsoft Business Premium assigned to them to Autopilot the device. If you have just assigned the account a Microsoft Business Premium, then wait 5-10 minutes to allow Microsoft to update these settings. Otherwise, you will be met with an MDM error.
This will install the Autopilot profile to this device. This will include Office Apps, Adobe etc.
It will set the device up to Azure and create a Windows Profile for the user you signed in with.
This process may take a bit of time. But once done, the device will be ready for work use.
You can manage Autopilot Devices on the Endpoint Manager Admin Portal
If you select ‘Devices’ on the left.
Then select ‘All Devices’. This will show you a list of all devices.
If you select a device and the device is a Windows Autopilot device, then you will see the following options:
The main option that we use is the ‘Autopilot Reset’ option.
This can be used after a user has left the business and you would like to machine reset and ready for work use for another user. Make sure the device is connected via an ethernet cable and charger and then select ‘Autopilot Reset’.
It make take up to 45 minutes for the reset to be sent to the device. But it will wipe itself and reenrol itself back into Autopilot devices. This process can take up to 24 hours.
![]()